The Disappearance of the Princes in the Tower

By 1483, the Wars of the Roses had been raging for almost thirty years. The conflict pitted two rival branches of England’s royal House of Plantagenet against one another: the House of Lancaster, represented by the Red Rose, and the House of York, represented by the White Rose. Both claimed to be the rightful heirs of King Edward III, whose many children had left competing branches of the family with strong claims to the throne. What began as a struggle between ambitious noble families would ultimately become one of the bloodiest succession crises in English history. The first major clash came in 1455 at the First Battle of St Albans. Richard, Duke of York, believed that King Henry VI’s repeated bouts of mental illness had left the kingdom vulnerable to misgovernment by powerful favourites, particularly Edmund Beaufort, Duke of Somerset. Initially, Richard did not seek the crown for himself. Instead, he argued that he should govern England as Lord Protector until the King recovered. However, as relations between the rival factions deteriorated and compromise became increasingly impossible, Richard eventually advanced his own dynastic claim to the throne. The struggle soon escalated into open civil war.
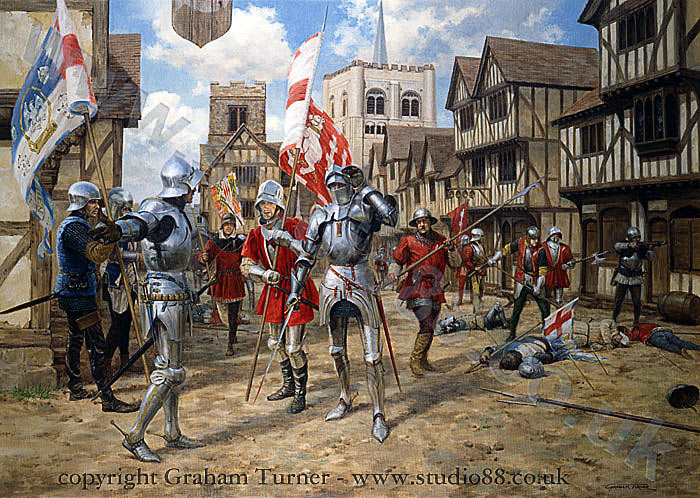
An illustration of soldiers during the atypical street fighting of the battle

Richard was killed at the Battle of Wakefield in 1460, but his claim did not die with him. Instead, it passed to his eldest son, Edward, who proved to be one of England’s greatest military commanders. In 1461, after a string of Yorkist victories culminating in the Battle of Towton, Edward seized the throne as King Edward IV. Although his reign gradually brought stability to much of England, it was not without controversy. In 1464, Edward secretly married Elizabeth Woodville, a widow from a relatively modest gentry family whose relatives had previously supported the Lancastrian cause. Many of the kingdom’s leading nobles, including Edward’s powerful ally Richard Neville, Earl of Warwick, were outraged. The Woodville family rapidly accumulated titles, wealth and influential marriages, creating bitter resentment among many of the older aristocracy.

The political turmoil reached its height in 1470 when Warwick and Edward’s own brother, George, Duke of Clarence, rebelled against the King. Edward was forced to flee England, allowing the imprisoned Henry VI to briefly reclaim the throne. The restoration lasted less than a year. Edward returned with an army in 1471, defeated Warwick at the Battle of Barnet and crushed the remaining Lancastrian resistance at the Battle of Tewkesbury, where Henry VI’s only son, Edward of Westminster, was killed. Days later, Henry himself died in the Tower of London, almost certainly murdered on Edward’s orders, although no definitive proof has ever emerged. For the next twelve years, Edward IV ruled England largely in peace. That stability was shattered on April 9th 1483 when Edward IV unexpectedly died at just 40 years old. His eldest son, the 12-year-old Edward V, immediately became King. Knowing that his heir was still a child, Edward IV had appointed his younger brother, Richard, Duke of Gloucester, to serve as Lord Protector until the young king came of age. Although Edward V was legally king from the moment of his father’s death, Richard was entrusted with governing the kingdom during his nephew’s minority.
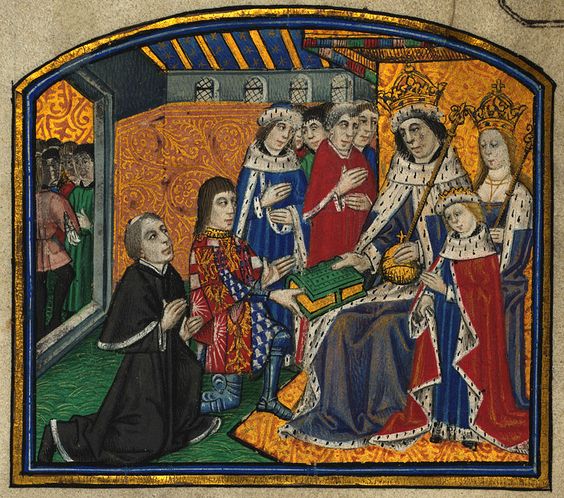
An illustration of Edward IV (crowned, seated, right) next to his wife, Elizabeth (far-right) and Edward, Prince of Wales (shorter, right) receiving a manuscript from Richard, Duke of Gloucester (kneeling, left, in red)

Almost immediately, however, a struggle for power erupted within the Yorkist court. Elizabeth Woodville feared that Richard would dominate the government and quickly attempted to establish a Regency Council centred around herself and her relatives before Richard could assume control as Protector. The Woodvilles had become deeply unpopular among much of the nobility, who viewed them as ambitious outsiders who had gained their influence through royal favour rather than birth. Richard, meanwhile, was governing northern England from Middleham Castle in Yorkshire when news of his brother’s death reached him. Travelling south to meet the young king, he intercepted Edward V and his entourage at Stony Stratford. There he arrested several leading Woodville supporters, including the King’s maternal uncle, Anthony Woodville, Earl Rivers, and his half-brother, Richard Grey. Although initially imprisoned, both men would later be executed on Richard’s orders. Richard then escorted his nephew to the Tower of London, the traditional royal residence where English monarchs stayed while preparing for their coronation. At this stage, there was little reason for contemporaries to view the move as suspicious.

Elizabeth Woodville, fearing for the safety of her younger children, fled with them to sanctuary in Westminster Abbey. Richard soon persuaded her to allow her youngest son, Richard, Duke of York, to leave sanctuary and join his brother in the Tower, assuring her that both boys would be treated honourably before Edward’s forthcoming coronation. Then, in June 1483, everything changed. A clergyman named Robert Stillington claimed that years earlier Edward IV had secretly entered into a legally binding marriage contract with Lady Eleanor Butler before marrying Elizabeth Woodville. Under medieval canon law, if the allegation were true, Edward’s marriage to Elizabeth would have been invalid, making all of their children illegitimate. Parliament accepted this argument in an act later known as Titulus Regius. If Edward V and his siblings had no legal claim to the throne, then the crown instead passed to Edward IV’s younger brother.

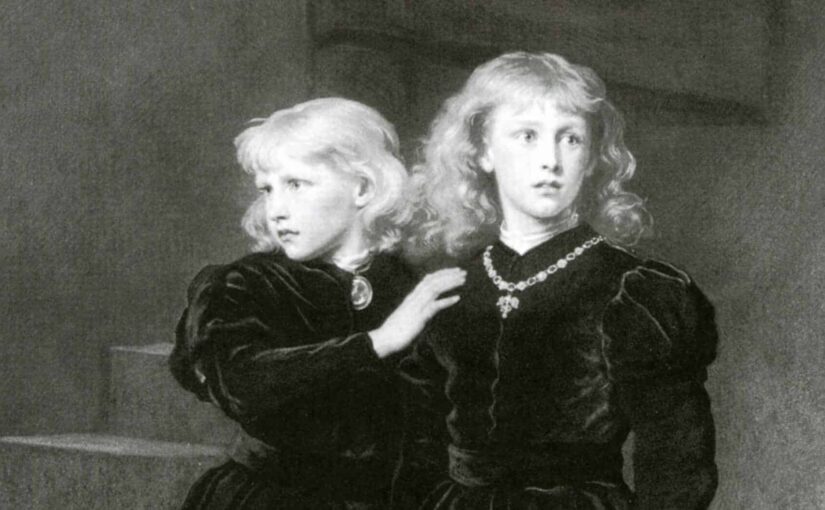
A painting of the Princes in the Tower

On June 26th 1483, Richard accepted the throne as King Richard III. The coronation of Edward V was cancelled. The two young princes remained inside the Tower of London. Dominic Mancini, a minor Italian diplomat, chronicled the time of the princes extensively. He wrote that they were often secluded to their rooms before he saw them less and less before they disappeared all together. At some point during their stay, Mancini wrote, that they were moved inside the White Tower, the location of Royal prisoners rather than the typical Royal living grounds. Mancini later reported that Edward V had become deeply withdrawn. According to the physician who attended him, the young king spent much of his time in prayer and confession, “like a victim prepared for sacrifice, sought remission of his sins by daily confession and penance, because he believed that death was facing him” The Great Chronicle of London later reported that the boys “were seen shooting [arrows] and playing in the garden of the Tower” on June 16th, 1483. This was the last time the boys were ever reported alive. By July 6th, Richard III was crowned as King. One day the boys were there and the next they were not. Some time in the summer of 1483, the boys hastily vanished and were never seen again. But who? And how?

Suspect #1: Richard III

Richard III, the boys’ uncle, has long been regarded as the prime suspect. As king, Richard controlled the Tower of London, its garrison and everyone who had access to the princes. If they were murdered while confined there, it would have been extremely difficult for such an act to occur without either his knowledge or his approval. Throughout his seizure of power in 1483, Richard had already imprisoned and executed several political rivals in order to secure his place on the throne. Although the princes had been eliminated from the succession, Richard’s hold on the monarchy was very insecure due to the way in which he had attained the crown, leading to a backlash against him by the Yorkist establishment. An attempt had already been made to rescue them and restore Edward V to the throne, clear evidence that the existence of the princes would remain a threat as long as they were alive. The boys could have been used by Richard’s enemies as figureheads for rebellion. Rumours of their death were in circulation by late 1483, but Richard never attempted to prove that they were alive by having them seen in public, which strongly suggests that they were dead by then. Richard also failed to open any investigation into his nephews’ disappearance, which would have been in his interest if he was innocent. Whether he killed the boys or not is up to interpretation but he is, by far, the prime suspect in their vanishing.

A painting of Richard III

However, Richard was absent from London for much of the period during which the princes disappeared. However, as king he did not need to be physically present to order their deaths. Some have presented Sir James Tyrrell as the one to get his hands dirty. Shortly before his execution in May 1502, he reportedly confessed, under torture, to murdering the two boys at the behest of Richard III, although the confession itself has never survived. Famed playwright William Shakespeare portrayed Tyrell as the actual culprit acting on Richard’s orders in his historical tragedy, ‘Richard III,’ largely based off this alleged confession. Tyrell’s culpability is supported as historians note that he had a rapid rise to positions of power throughout Richard’s rule. Richard’s guilt in the matter, directly or not, was widely accepted by contemporaries, including Elizabeth, who would go on to support Henry Tudor in his campaign against Richard III. One possible motive for Elizabeth Woodville subsequently making her peace with Richard III, and bringing her daughters out of sanctuary, could be that Richard had to swear a solemn oath, before witnesses, to protect and provide for her surviving children, which made it much less likely they could be quietly murdered as it was believed their brothers had been.

However, much of his image was shaped post-mortem. After his slaying at the Battle of Bosworth in 1485, Henry Tudor claimed the throne and united both houses of Lancaster and York under the now infamous Tudor dynasty as King Henry VII. Henry VII oversaw an act of Parliament that accused Richard of “the unnatural, mischievous and great perjuries, treasons, homicides and murders, in shedding of infant’s blood, with many other wrongs, odious offences and abominations against God and man,” with the “shedding of infant’s blood” possibly being a reference to the disappearance of the princes. Decades later, Sir Thomas More, Lord High Chancellor under the infamous King Henry VIII, wrote a highly influential history of Richard III in which he described Richard as “physically deformed, an outward manifestation of his villainous ways.” Although More had been only a child when the princes disappeared, his account became one of the principal sources for later Tudor historians and, eventually, William Shakespeare. Shakespeare cemented this image in the public imagination, portraying Richard as a murderous, physically deformed tyrant in Richard III. Although Richard’s skeleton, discovered beneath a Leicester car park in 2012, confirmed that he suffered from scoliosis, it showed nothing like the hunchback with the withered hand described by Tudor writers.

Suspect #2: Henry VII
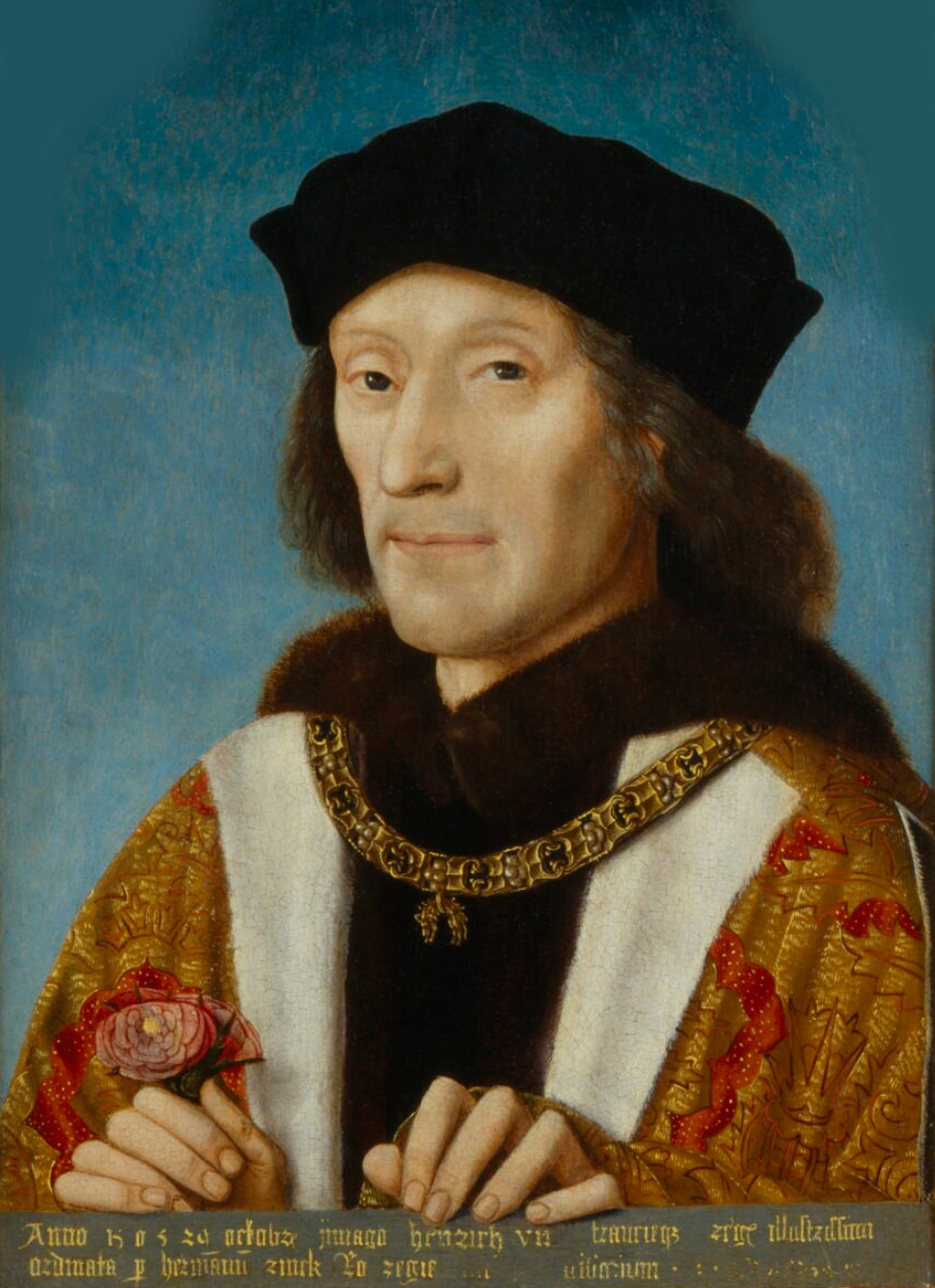
A painting of Richard III

Whilst Richard III is the near universal consensus amongst historians, an alternative suspect has been proposed, that being Henry VII. His claim, based on a maternal Lancastrian bloodline, a minor paternal relation and his victory at the Battle of Bosworth, was almost as contentious as Richard’s, if not more so. His most direct ancestor to Edward III was his mother, Margaret Beaufort, a great-granddaughter of John of Gaunt (Edward III’s third son). However, this line came from an affair and was originally born out of wedlock, though later made legal by Parliament with the condition that they were barred from the throne. His claim was only legitimised once he married Elizabeth of York following his defeat of Richard III on the field of battle. Not wanting the legitimacy of his wife or her claim as heir of Edward IV called into question, prior to the marriage he had repealed the Titulus Regius, which delegitimised not just the princes but also his wife. Supporters of this theory argue that the princes survived Richard III’s reign and were only murdered after Henry seized the throne in 1485, removing rival Yorkist claimants whose superior hereditary rights threatened his own rule. Had either Edward V or his younger brother Richard emerged alive after Bosworth, Henry’s own claim to the throne would have collapsed almost overnight. As the legitimate sons of Edward IV, both possessed a far stronger hereditary right than the new Tudor king. Their continued existence therefore represented a permanent political danger to his dynasty.

Some writers have suggested that Elizabeth Woodville’s sudden fall from royal favour may hint that she knew more about her sons’ fate than history has recorded. In 1487, Henry deprived her of many of her estates and she retired to Bermondsey Abbey, where she lived quietly until her death in 1492. The reasons for her withdrawal remain uncertain. Some historians have argued that Henry deliberately removed her from court because she knew of his alleged involvement in the princes’ deaths, although there is no contemporary evidence to support this claim. Others believe her retirement was voluntary or a sensible political precaution following the uprising of the pretender Lambert Simnel. Interestingly, Simnel was initially presented by some supporters as Richard, Duke of York, Elizabeth’s younger son, before his backers instead claimed he was Edward Plantagenet, Earl of Warwick, whose identity was considered more convincing. The episode demonstrated that, several years after the princes’ disappearance, rumours that at least one of them might still be alive were still circulating throughout England.
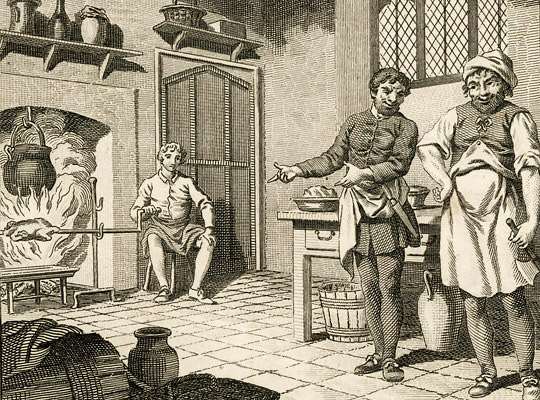
An engraving of Simnel (left)

Historians have interpreted Henry’s silence on the matter in different ways. Some argue that it reflected guilty knowledge, while others believe there was simply little political advantage in reopening a mystery that already damaged Richard III’s reputation. In addition, Henry was never accused of the murders by any contemporary, which would have been politically advantageous to his allies. Even the Richard III Society, an organisation dedicated to reassessing Richard’s reputation, acknowledges the weakness of the case against Henry, arguing that “With Henry, as with Richard, there is no real evidence and one must suspect that if he had killed the princes himself he would quickly have produced the corpses and some ingeniously appropriate story implicating Richard.” It is also unlikely that the princes would have been kept alive in secret by Richard for two years after their last sighting while rumours of his responsibility for their murder circulated. For this reason, most historians continue to regard Henry VII as a considerably less likely suspect than Richard III. The theory depends upon both princes surviving Richard’s reign without leaving any convincing trace in the historical record – something for which there is no contemporary evidence.

Suspect #3: Henry Stafford, 2nd Duke of Buckingham

Suspicion has also fallen upon Henry Stafford, 2nd Duke of Buckingham, Richard III’s closest political ally during his seizure of the throne. Unlike Henry VII, Buckingham was present in England during the princes’ disappearance and, as one of Richard’s most trusted supporters, may have had the opportunity to gain access to them. His later rebellion against Richard in October 1483 has led some historians to wonder whether relations between the two men had broken down over the princes’ fate. Buckingham also possessed a distant royal claim of his own. Through both his father and mother he descended from Edward III, giving him at least a theoretical claim to the English throne should the existing Yorkist line disappear. Alternatively, he may have been acting on behalf of a third party. His rebellion remains one of the greatest mysteries of Richard’s short reign. Historians still debate whether Buckingham rose against the king because he had been denied rewards, because he regretted helping Richard seize the throne, or because he was himself implicated in the disappearance of the princes. One of the most intriguing pieces of evidence comes from a contemporary Portuguese memorandum, which claimed that Richard entrusted the princes to Buckingham’s custody, where they were deliberately starved to death. A later English source likewise claimed that the murders were committed “by the vice [advice] of the Duke of Buckingham.”
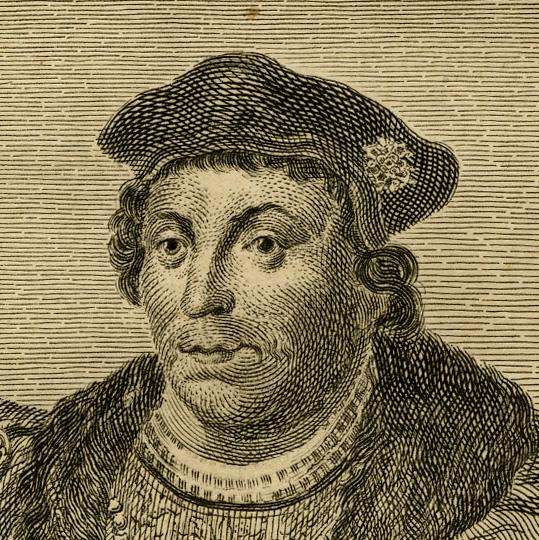
A portrait of Buckingham

This has led some to believe that Buckingham, and possibly Tyrell, acted independently of the King, slaying the princes without waiting for Richard’s orders. One historian noted that “After the King’s departure Buckingham was in effective command in the capital, and it is known that when the two men met a month later there was an unholy row between them.” However, if he were guilty of acting without Richard’s orders, it is extremely surprising that Richard did not lay the blame for the princes’ murder on Buckingham after Buckingham was disgraced and executed, especially as Richard could potentially have cleared his own name by doing so. However, some have claimed that Richard would have kept silent had Buckingham been guilty because nobody would have believed Richard was not involved in the crime. In addition to that, it is likely he would have required Richard’s help to gain access to the princes, under close guard in the Tower of London. Buckingham is the only alternative suspect, aside from Richard III himself, to be directly implicated in a contemporary source. Even so, the surviving evidence is fragmentary, and historians remain deeply divided over whether the accusations reflect genuine knowledge or little more than court gossip.

In 1674, workmen demolishing part of the Tower discovered the skeletons of two children beneath a staircase in the White Tower. Charles II ordered the remains reburied in Westminster Abbey, where they remain today. The inscription placed upon the urn confidently identifies them as Edward V and Richard, Duke of York, and that they were “suffocated by mattresses thrown upon them, their father’s brother Richard [III], perfidious usurper of the kingdom, ordered to be buried secretly and dishonourably.” However, the inscription reflects seventeenth-century belief rather than historical proof. The remains were never tested with Yorkist descendants to see if they actually were the princes. A second pair of children’s coffins were discovered in 1789 at St George’s Chapel in Windsor in a sealed tomb. The tomb was resealed and has remained that way ever since. We may ultimately never know what happened to the Princes in the Tower, whether they were murdered by their uncle, other scheming relatives or if they possibly lived their life out peaceably in France. Until any further investigations go forth, the case may forever remain unsolved.
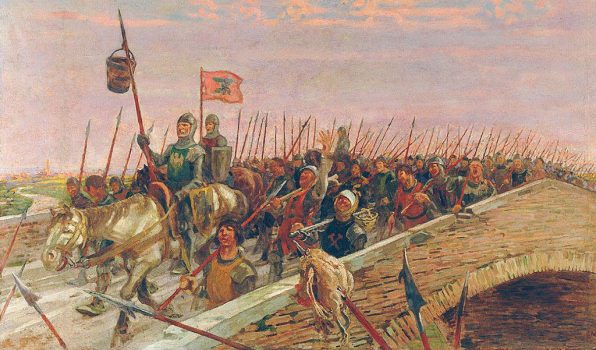
The War of the Bucket

Over many many years, the Pope had been used as a puppet by European countries to gain leverage and power in politics. After the collapse of the Roman Empire, Charlemagne requested of the Pope to be nominated Holy Roman Emperor. This formed a circular power struggle, wherein the Pope had power over the Holy Roman Emperor but the Holy Roman Emperor had power over the Pope. This created multiple feuds spanning over centuries in Europe, especially in Northern Italy.

Northern Italian City states began becoming independent, picking an either pro-Emperor (Ghibelline) or pro-Pope (Guelph) side. Many states switched between the two. One famous conflict was between the Ghibelline Mondena and the Guelph Bologna. The two cities had been feuding for years and this conflict between the Pope and the Emperor was the final push.

The first thing that needs to be established is that Bologna had a well. A traditional well with a bucket. By this time, this system of collecting water had become antiquated, but by lord did Bologna love this bucket.

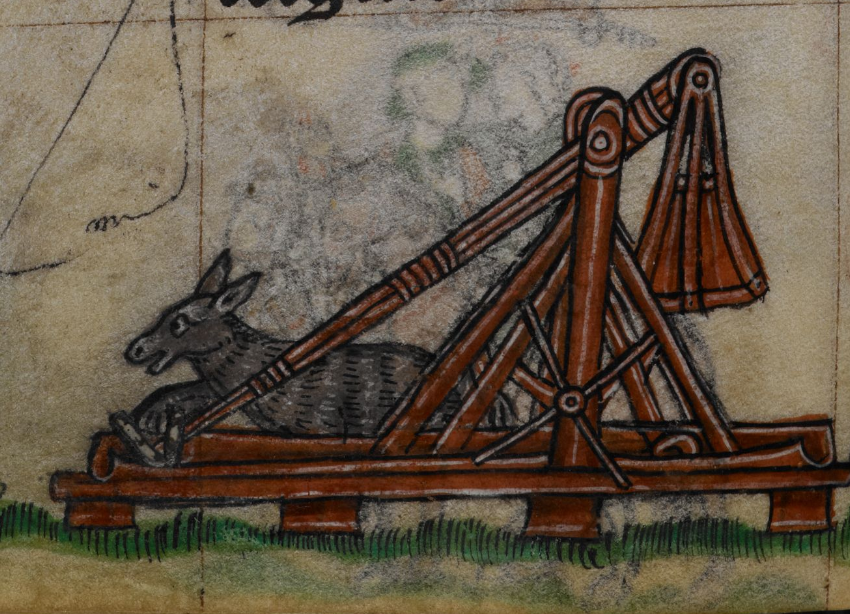
In 1249, a large battle ensued, ending in a Bolognese victory, to which they catapulted a live donkey into Modena

Yes, someone actually drew this image of a live donkey, prepped on the catapult. He looks so shocked and bemused. I don’t think he knew what was about to happen

Ever since the battle, the two cities would take groups into each other’s territory and wreak havoc on the other side. On one such trip in 1325, perpetrated by the Bolognese, the Modenese had enough

In the South West of their territory, the Bolognese had two forts guarding their area, Monteveglio and Zappolino. The Modenese lay seige upon and eventually captured Monteveglio

Around this time, a myth circulated that Bologna’s bucket had been stolen by Modena and this was the real reason for the war, whilst actually the bucket was most likely never stolen and the reason for the war was probably just their fort being taken.

Bologna split their forces. One half was to take back Monteveglio and the other half was stationed at various points along the river dividing the two territories. Modena managed to bait the Bolognese forces into going North before crossing the river at the south. Whilst the Bolognese expected them to break the siege at Monteveglio, they instead took Zappolino. Not being able to afford the loss of both of their forts, Bologna moved all their forces to defend Zappolino.

The forces encountered one another outside Zappolino and after a fight at sunset, the Modenese won, and chased the Bolognese back to Bologna. Upon arrival, they did not lay siege. Instead they set up camp and partied for the next three days, before stealing Bologna’s bucket and leaving.

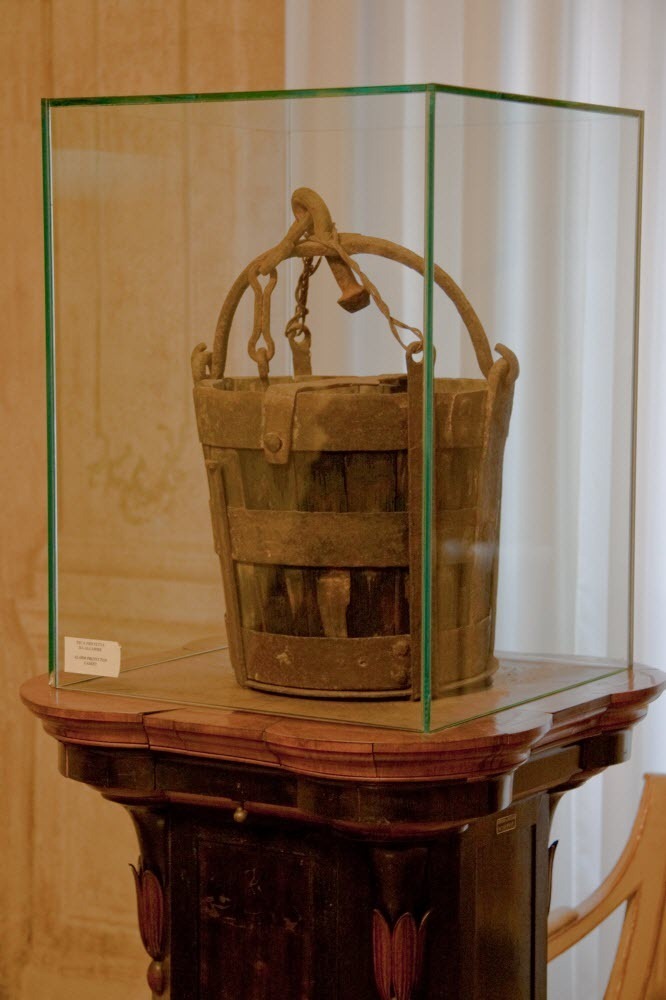
A peace treaty was agreed upon, wherein Bologna would pay war reparations to Modena if Modena agreed to give back all stolen territory. Modena kept the bucket. It sits on display in Modena City Hall to this day.

Bologna’s bucket on display in Modena City Hall

The Battle of Hastings

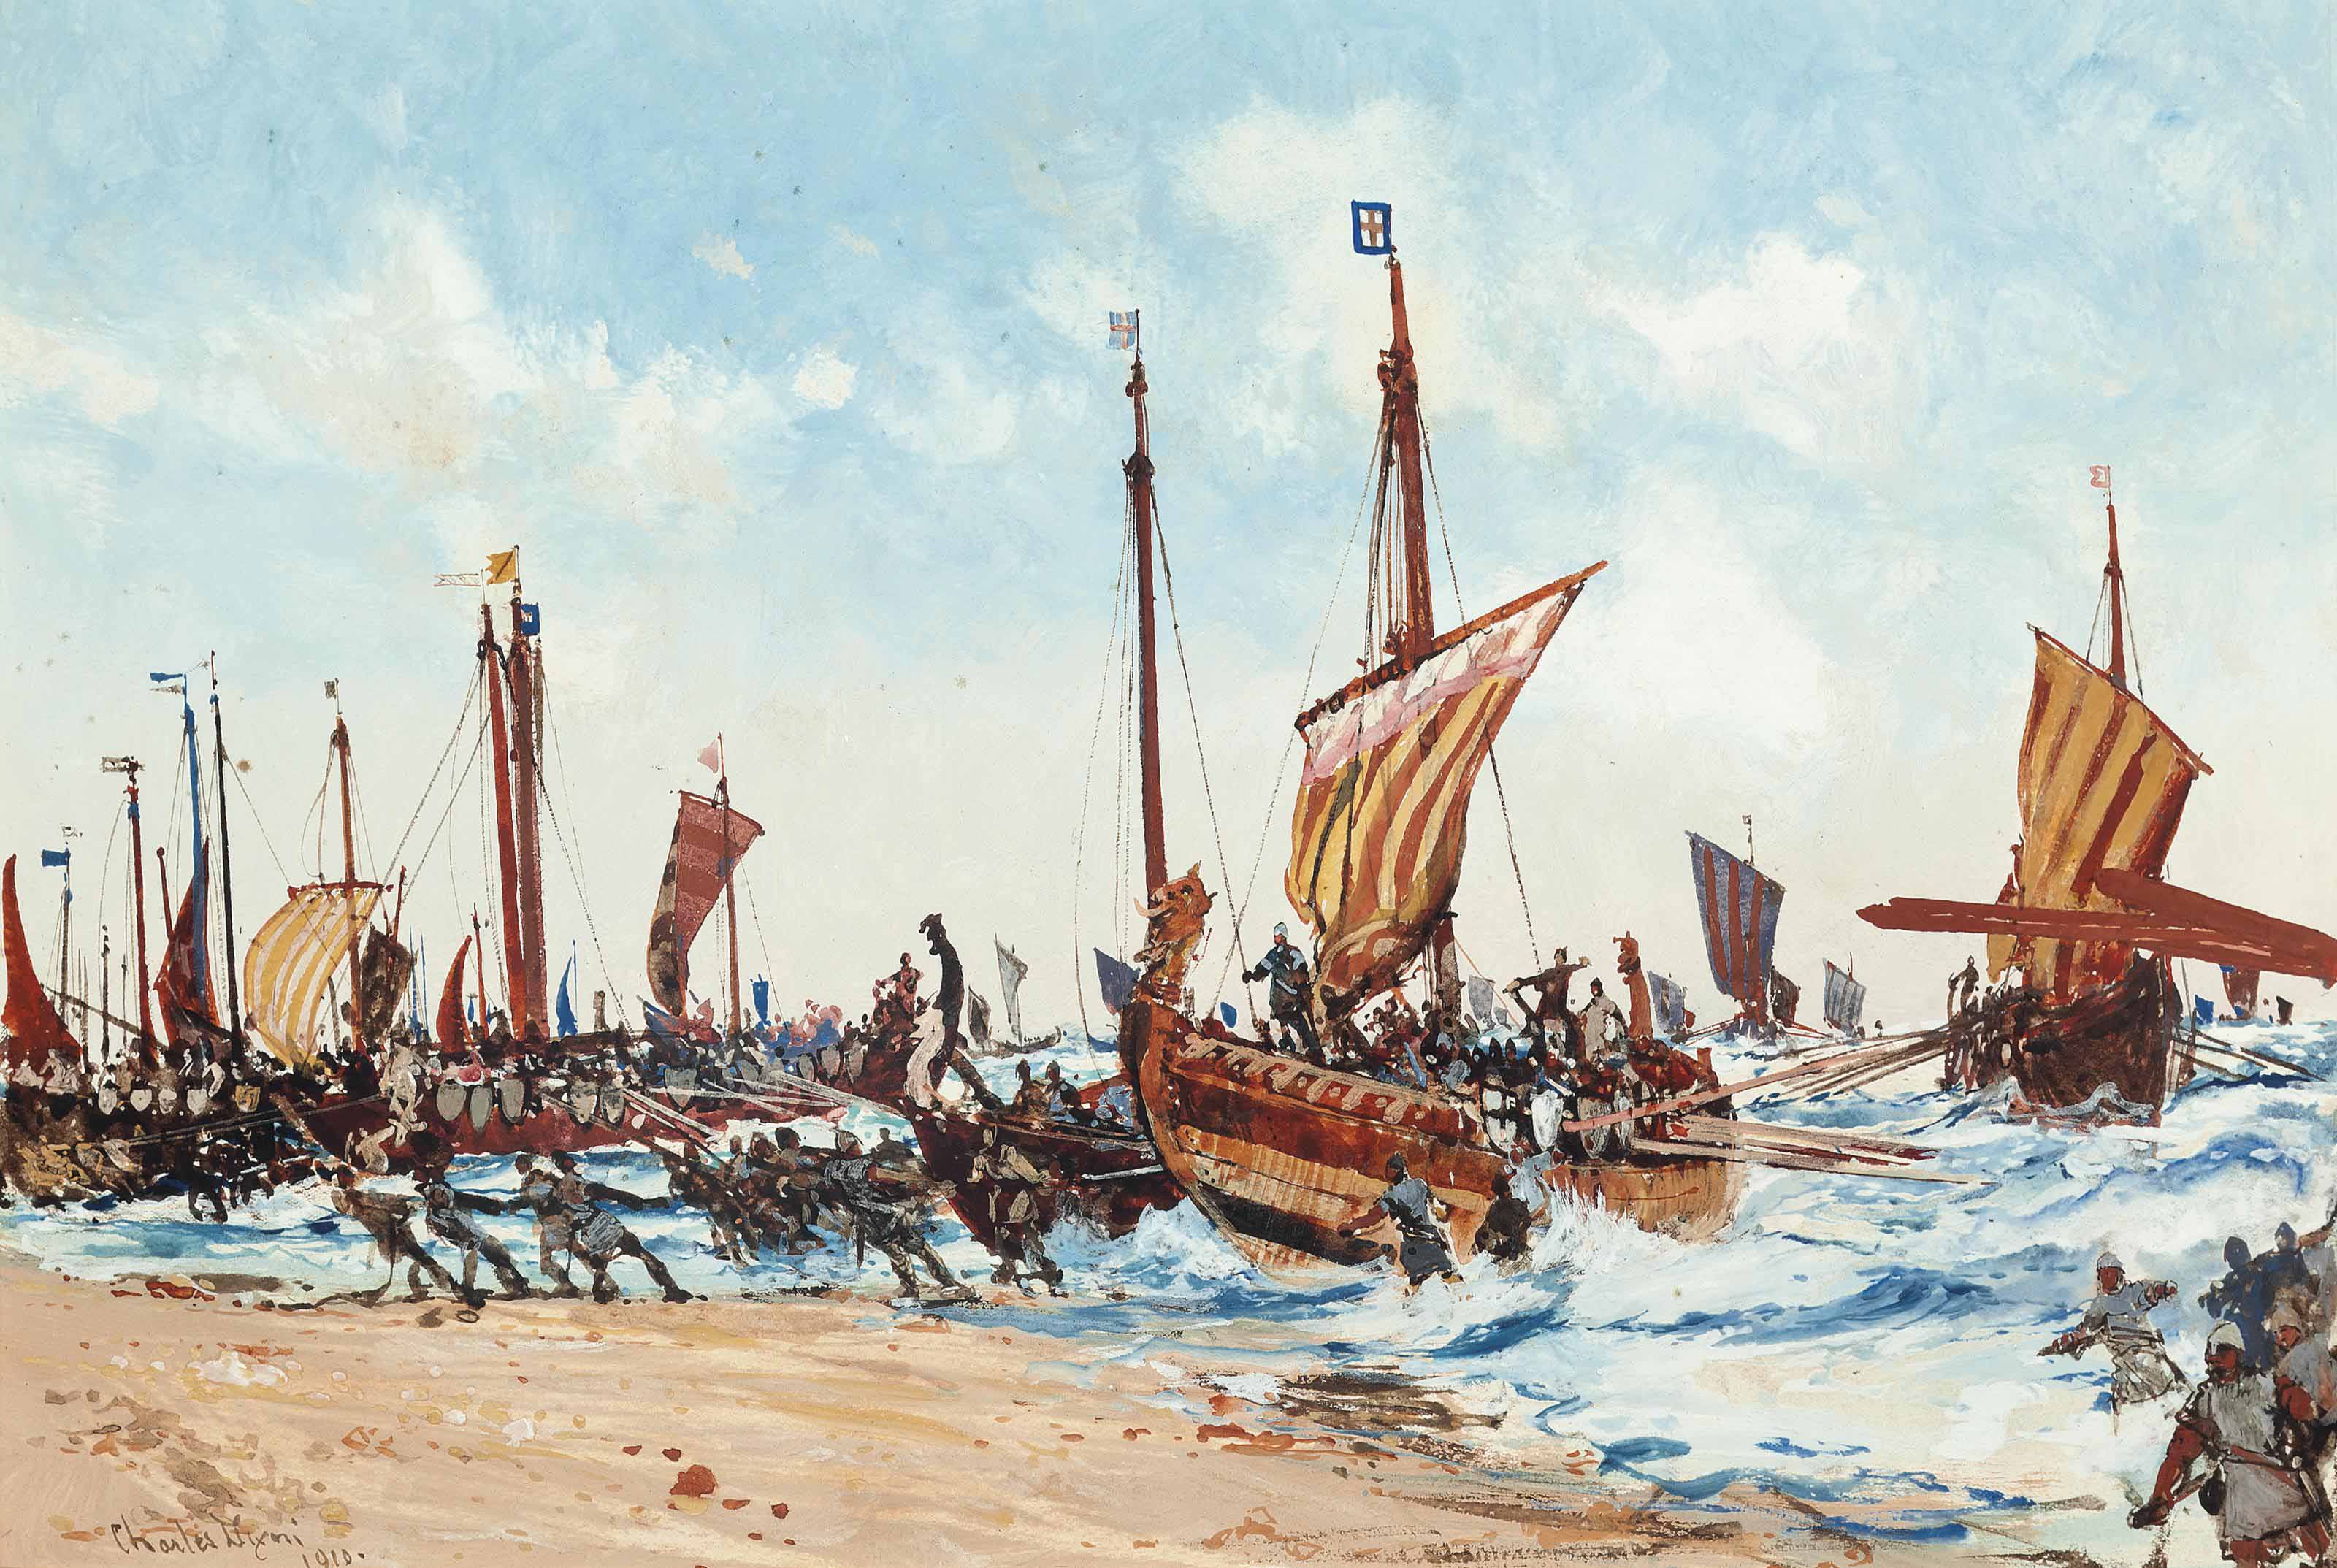
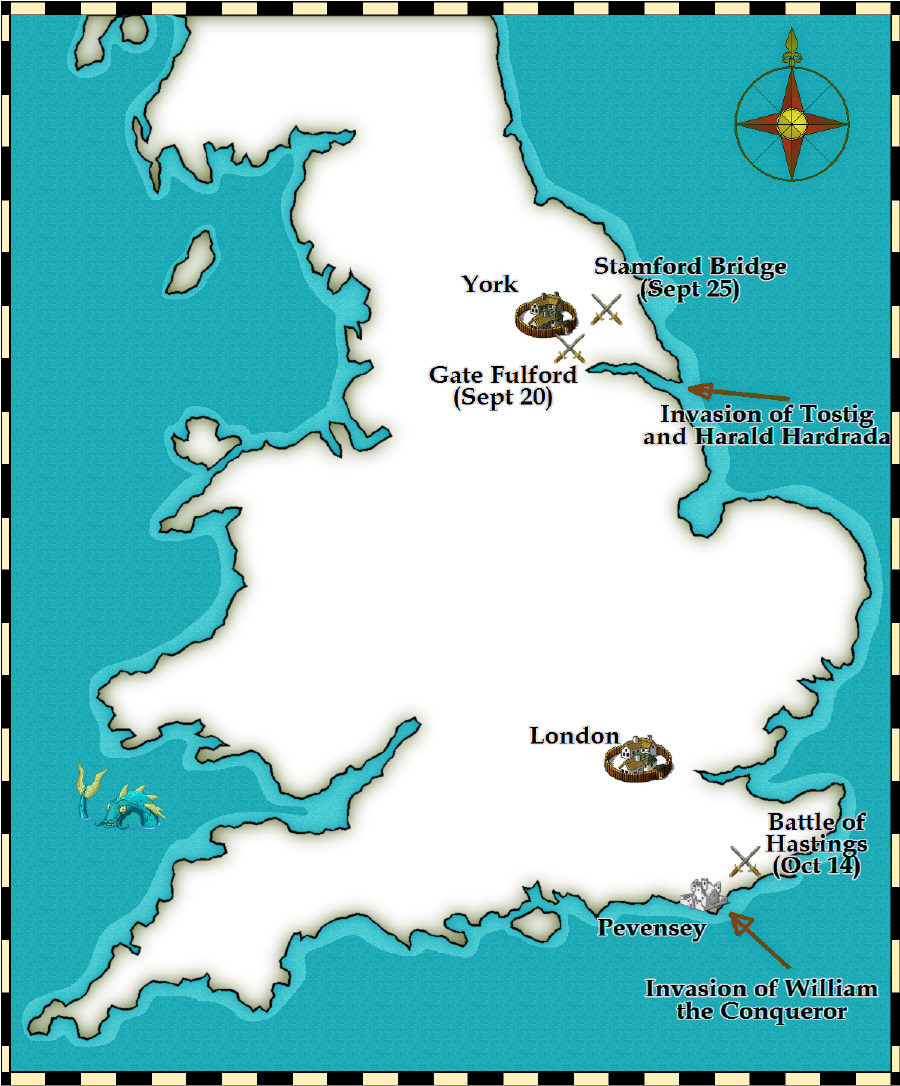
On September 25th 1066, King Harold Godwinson had won one of the greatest victories in English history. At Stamford Bridge, he had destroyed the invading Norwegian army and killed both Harald Hardrada and his own brother, Tostig Godwinson. It appeared that England’s succession crisis had been settled. It had not. While Harold fought in the north, the winds over the English Channel finally changed. For weeks, William, Duke of Normandy, had been trapped by unfavourable weather, unable to launch his invasion. Now, with the sea finally calm, his fleet of several hundred ships crossed the Channel almost unopposed. On 28 September 1066, William landed at Pevensey on the Sussex coast with an army of around 7,000 men, made up of Norman, Breton and Flemish soldiers. Rather than marching immediately on London, William established a secure base, constructed a wooden castle at Hastings and began devastating the surrounding countryside. Villages were burned, crops destroyed and livestock seized. It was a deliberate strategy. William hoped to provoke Harold into attacking before the English king had time to rest his exhausted army or gather reinforcements.

An illustration of the Norman landing at Pevensy

The tactic worked. Having marched almost 190 miles north to defeat Hardrada, Harold now turned his army around and marched roughly 250 miles back to southern England in little more than two weeks. Although some advisers urged him to wait for additional troops, Harold knew every day William remained in England strengthened the Norman position. He decided to confront the invaders immediately.

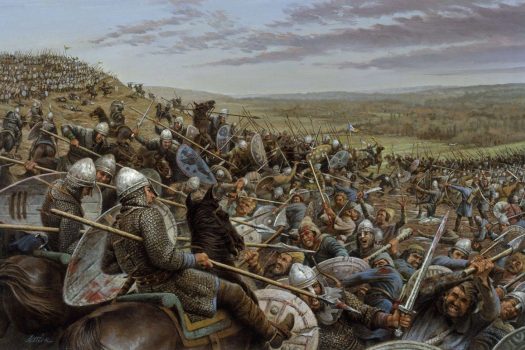
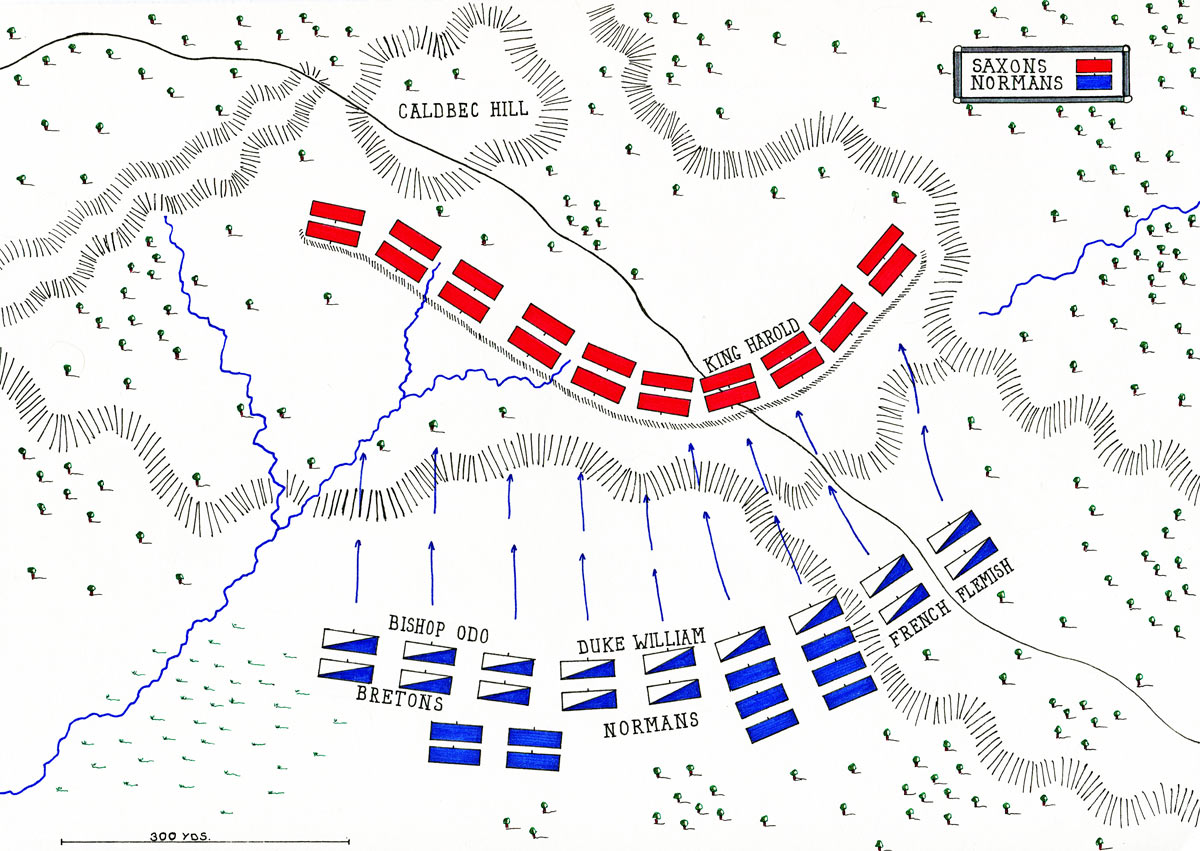
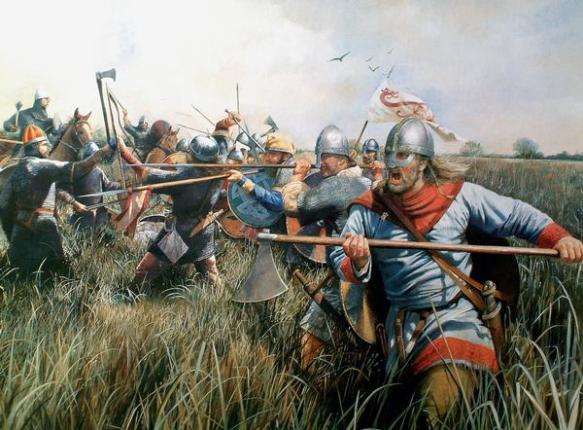
On the morning of October 14th 1066, the two armies met on Senlac Hill, just north of Hastings. Harold deployed his army along the crest of the ridge in a dense shield wall, one of the strongest defensive formations in Anglo-Saxon warfare. Packed shoulder to shoulder, English housecarls and fyrd locked their shields together, presenting an almost impenetrable barrier of wood and steel. The position forced the Normans to attack uphill, giving Harold a considerable defensive advantage. William organised his army into three divisions. Breton troops held the left flank, Normans occupied the centre under William’s own command, while French and Flemish soldiers formed the right. Unlike the English, William possessed a balanced army of infantry, archers and heavily armoured cavalry, giving him greater tactical flexibility. The battle began with a volley of Norman arrows, but the steep slope meant many projectiles either struck the English shields or flew harmlessly overhead. William then ordered his infantry forward. Wave after wave climbed the hill only to be met by the disciplined English shield wall. Axes, spears and swords cut down attackers as they struggled up the incline, and the Norman assault stalled.

A map of the battle

William next committed his cavalry. Charging horses into a solid wall of overlapping shields proved no easier than the infantry attack. Again and again the Norman knights were thrown back down the hillside. By midday, it seemed Harold’s defensive position might hold. Then the battle took an unexpected turn. At some point during the fighting, part of the Norman army broke and fled. Medieval chroniclers disagree over exactly why. Some claimed a rumour spread that William himself had been killed. Others suggested sections of the Breton line simply lost their nerve after suffering heavy casualties. Whatever the cause, part of the Norman army retreated down the hill.

Believing victory was within reach, sections of the English line abandoned the safety of the shield wall and pursued the fleeing enemy. It was a costly mistake. William, who was very much alive, reportedly removed his helmet so his soldiers could recognise him before rallying his men. Turning his cavalry back towards the pursuing English, he launched a devastating counterattack. The English soldiers who had broken formation suddenly found themselves isolated from the main shield wall. Surrounded by mounted knights, many were cut down where they stood.

The Bayeux Tapestry depicting William (central) removing his helmet as to be recognised by his men

Whether this retreat had been planned from the beginning or was simply exploited by William remains one of the great debates of medieval history. Whatever the truth, the tactic worked. Throughout the afternoon, further Norman assaults gradually weakened the English line, each attack creating fresh gaps in Harold’s once-formidable defence. As daylight began to fade, the battle reached its climax.

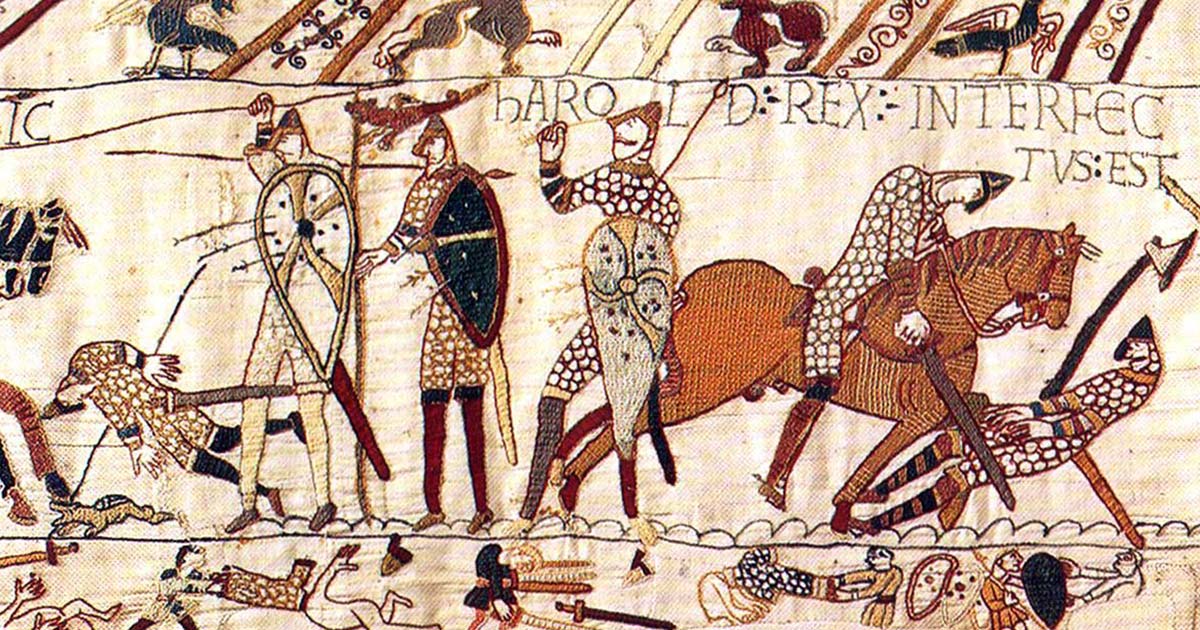
King Harold himself was killed during the fighting. How exactly he died remains uncertain. The famous image from the Bayeux Tapestry appears to show a man, traditionally identified as Harold, struck in the eye by an arrow before being cut down by Norman knights. However, many modern historians question whether this interpretation is correct. Contemporary accounts simply agree that Harold died in the final stages of the battle while fighting amongst his household troops.

The Bayeux Tapestry depicting the death of Harold Godwinson (central)

Around him, the last of the English housecarls continued fighting long after the battle had already been lost. Many died where they stood, refusing to abandon their fallen king. By nightfall, the English army had collapsed. Harold’s death left England leaderless. Although several English nobles proclaimed Edgar Ætheling king, there was little hope of organising effective resistance. William advanced steadily towards London, accepting the surrender of towns along the way while devastating those that resisted. Eventually, England’s leading nobles recognised that further resistance was futile. On Christmas Day 1066, William was crowned King of England in Westminster Abbey.

Even his coronation reflected the uncertainty surrounding his rule. As those inside the abbey shouted their acclamations for the new king, Norman soldiers stationed outside misunderstood the noise, believing a rebellion had broken out. Panicking, they set fire to nearby buildings while searching for attackers. Smoke drifted into the abbey as the coronation continued, a fitting symbol of the uneasy beginning of Norman rule. Yet William’s victory at Hastings did not immediately secure England.

An illustration of William’s coronation

Over the following years, rebellions erupted across the country. The most serious came in the north, where English nobles, joined at times by Danish fleets, repeatedly rose against Norman authority. William responded with overwhelming force. During the winter of 1069–1070, he launched what became known as the Harrying of the North. Villages, crops and livestock were systematically destroyed across large parts of Yorkshire and surrounding counties. Medieval chroniclers described entire communities left starving as farmland was burned and food supplies deliberately eliminated. Modern historians continue to debate the scale of the devastation, but there is little doubt that it was one of the harshest campaigns ever carried out in medieval England. The suppression of these rebellions finally secured William’s hold over the kingdom. Over the next two decades he transformed England’s government, replacing much of the Anglo-Saxon nobility with Norman lords, constructing hundreds of castles to enforce royal authority and commissioning the Domesday Book, one of the most comprehensive land surveys of the medieval world.

For many Englishmen, the death of Edward the Confessor had initially raised hopes that a new king would simply restore stability after a disputed succession. Instead, the crisis of 1066 ushered in one of the most turbulent periods in the nation’s history. Three major battles were fought in the space of a single month, thousands died, England’s ruling elite was almost completely replaced, and Norman French became the language of the royal court for centuries to come. The Battle of Hastings was not merely the end of Harold Godwinson’s reign. It marked the beginning of a new England – one whose language, laws, aristocracy and culture would be permanently reshaped by the Norman Conquest.

The Battle of Stamford Bridge

Just five days after suffering defeat at the Battle of Fulford, England’s fortunes changed dramatically. King Harold Godwinson, having learned of Harald Hardrada’s victory in northern England, acted with astonishing speed. Rather than waiting for reinforcements, Harold gathered his household troops—the elite housecarls—and every available soldier he could muster before marching nearly 190 miles (305 km) from London to Yorkshire in just four days. It was one of the fastest military marches recorded in medieval Europe.

A map of England, demonstrating the distance between London and York

Meanwhile, Harald Hardrada believed his campaign was progressing exactly as planned. Following his victory at Fulford, the city of York had agreed to submit to the Norwegian king. The city’s leaders promised to formally surrender and hand over hostages a few days later at Stamford Bridge, a small crossing over the River Derwent around eight miles east of York. Confident that the English king was still hundreds of miles away in the south, Hardrada marched to the meeting place with only part of his army. Many of his warriors left their armour behind aboard the fleet anchored at Riccall, believing they were travelling to a peaceful exchange rather than a battle. Although they still carried weapons, the absence of mail coats and helmets would soon prove disastrous.

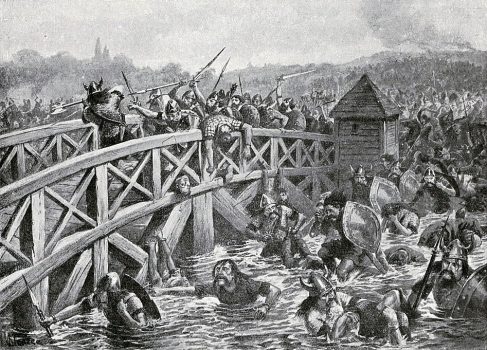
On the morning of September 25th 1066, the Norwegians received an unpleasant surprise. Emerging over the surrounding hills was the banner of King Harold Godwinson and the full English army. Realising they had been caught completely off guard, Harald Hardrada hurriedly organised his men into a shield wall while messengers raced back towards Riccall to summon the rest of the Norwegian army under Eystein Orre. Every minute they could delay the English advance increased the chances that reinforcements would arrive. According to later Norse tradition, that delay came from a single extraordinary warrior. As the English army approached Stamford Bridge, one enormous Viking is said to have taken up position on the narrow wooden crossing. Wielding a massive Dane axe, he allegedly held off dozens of English soldiers by himself, cutting down anyone who attempted to cross. The story claims that the lone warrior was finally killed only when an English soldier floated beneath the bridge in a barrel and thrust a spear upwards through the gaps in the planks.

An illustration of the lone Viking fending off the English Army

Whether this duel actually happened is impossible to know. The story first appears in later Norse sagas rather than contemporary English accounts, and many historians regard it as legendary. Nevertheless, it remains one of the most famous tales of the Viking Age and illustrates the fierce reputation of Norse warriors. Whatever delayed Harold’s advance, it gave Hardrada enough time to form his army into a defensive position. The battle began with the English advancing against the Norwegian shield wall. Harold’s experienced housecarls, armed with heavy two-handed axes, clashed with Viking warriors in brutal hand-to-hand combat. For a time the Norwegians held firm, and the fighting was fierce across the line. In the thick of the battle, Harald Hardrada himself fought at the front of his army. According to the Icelandic historian Snorri Sturluson, the sixty-year-old king wore no armour, believing speed and mobility were more valuable than protection. Towering over many of his men, Hardrada reportedly fought with characteristic ferocity until an English arrow struck him in the throat, killing him almost instantly.

The death of their king sent shockwaves through the Norwegian army. Command then passed to Tostig Godwinson, Harold’s estranged brother. According to several medieval sources, Harold paused the fighting and offered Tostig his old earldom back if he abandoned the invasion. Tostig refused, instead asking what Harald Hardrada would receive. Harold reportedly replied that, because the Norwegian king was so tall, he would grant him “seven feet of English ground – or perhaps a little more.” Whether these words were actually spoken is uncertain, but they became one of the most famous exchanges in medieval history.

A painting of Hardrada being slain

Soon afterwards, Eystein Orre finally arrived from Riccall with the remaining Norwegian troops after running several miles in full armour under the late September sun. Exhausted before they even reached the battlefield, they nevertheless launched a desperate counterattack, remembered in Norse tradition as Orre’s Storm. The assault briefly checked the English advance but quickly lost momentum as fatigue overwhelmed the reinforcements. By late afternoon, the Norwegian army collapsed. Thousands of Viking warriors were killed, including Harald Hardrada, Tostig Godwinson and many of Norway’s leading nobles. So devastating were the losses that, according to the Anglo-Saxon Chronicle, only 24 of the approximately 300 ships that had carried the invasion force to England were needed to transport the survivors home.

The Battle of Stamford Bridge is often regarded as marking the end of the Viking Age in England. Although Scandinavian influence would remain strong around the North Sea, no Viking king would ever again mount such a serious attempt to conquer the English throne. Yet Harold Godwinson had little time to celebrate. Just three days after his victory, news arrived that the winds in the English Channel had finally changed. William, Duke of Normandy, had landed on the south coast with his invasion army. Harold immediately turned his exhausted troops around and began another forced march – this time nearly 250 miles back towards London. Less than three weeks after Stamford Bridge, England’s fate would be decided once more on the battlefield, at Hastings. There, Harold’s greatest triumph would be followed by his greatest defeat, and the course of English history would change forever.

The Battle of Fulford

In the summer of 1066, England stood on the brink of invasion. Following the death of Edward the Confessor, Harold Godwinson had been crowned king, but his claim was disputed by rivals both at home and abroad. Expecting an invasion from William, Duke of Normandy, Harold stationed his army along England’s southern coastline. Day after day, however, the invasion never came. Unfavourable southernly winds trapped William’s fleet in Normandy, preventing him from crossing the English Channel.

The Bayeux tapestry depicting the Norman men preparing their supplies

By early September, Harold faced a different problem. England’s fyrd – a militia made up largely of farmers – could not remain under arms forever. Harvest season had arrived, food supplies were running low, and many men needed to return home to gather their crops before winter. Reluctantly, Harold dismissed much of his army and navy, believing that the threat of invasion had passed for the year. It was at precisely this moment that disaster struck.

While the winds held William in France, they carried Harald Hardrada, King of Norway, across the North Sea. Accompanied by around 300 longships and perhaps 10,000 warriors, Harald was joined by Tostig Godwinson, Harold’s exiled younger brother. Tostig had once been Earl of Northumbria before being driven into exile after a rebellion. Bitter towards his brother for refusing to restore him to power, he now sought revenge by helping Hardrada seize the English throne. The Norwegian fleet landed on the Yorkshire coast before sailing up the Humber and River Ouse. As they advanced inland, villages were plundered for food and supplies, while terrified communities fled before the Viking army. Their objective was not simply to raid but to conquer. The ancient city of York, England’s second-largest city, stood directly in their path.

A depiction of the Viking landing in York

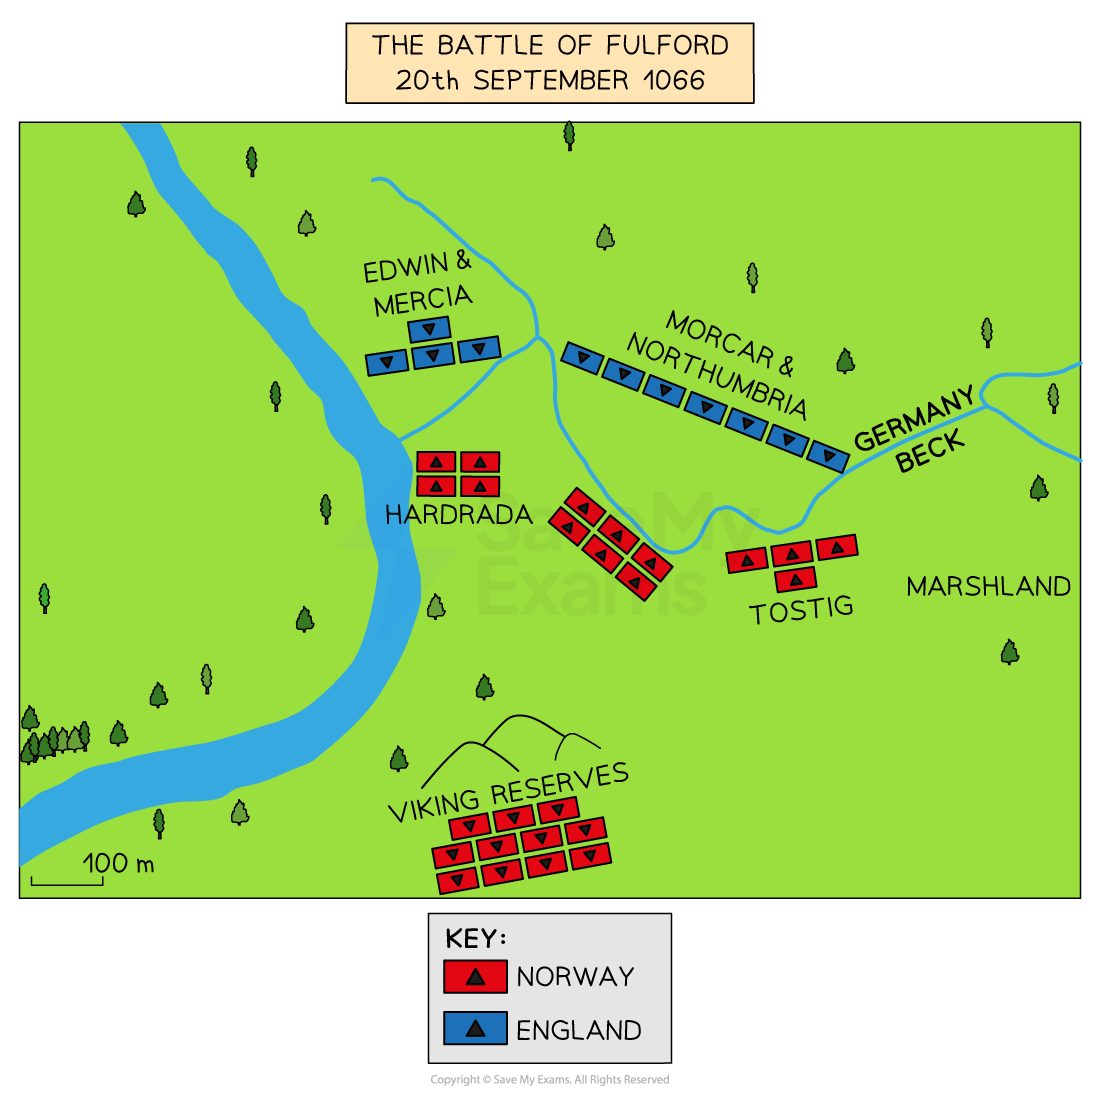
To stop the invasion, the defence of northern England fell to two powerful earls: Edwin, Earl of Mercia, and Morcar, Earl of Northumbria. Together they assembled the regional fyrd and marched south from York to intercept the invaders before they could reach the city. On September 20th 1066, the two armies met just outside York near the village of Fulford. The battlefield heavily favoured the defenders – or so it first appeared. The English army formed a shield wall on a strip of firm ground between the River Ouse to one side and a stretch of marshland crossed by the Cock Beck on the other. This narrow front prevented the Norwegians from bringing their superior numbers to bear all at once. If the English line held, the Vikings would be forced into a costly frontal assault. Harald Hardrada nevertheless accepted battle.

The fighting began with both armies crashing together in a brutal contest of shields, spears and axes. Contemporary accounts and later Norse sagas describe desperate hand-to-hand combat lasting for hours. Morcar is said to have fought fiercely at the front of the English line, encouraging his men as they resisted repeated Norwegian assaults. The narrow battlefield initially prevented either side from gaining a decisive advantage. Gradually, however, the tide began to turn. As the marshland was flooded by the incoming tide, parts of the English line became compressed against the higher ground, creating confusion among the defenders. Hardrada recognised the opportunity. Rather than continuing a simple frontal attack, he committed fresh troops that had been held in reserve, extending his line around the weakened English flank. Once the English formation began to buckle, the Norwegian warriors poured through the gap.

A modern map of the battle

The battle quickly became a rout. Many English soldiers attempting to retreat were trapped between the marshes and the River Ouse, where countless men were cut down or drowned trying to escape. Others fled back towards York pursued by the victorious Vikings. The defeat was devastating for northern England. Morcar and Edwin survived, but their army had been shattered. With no force left capable of defending the city, York negotiated its surrender to Hardrada only a day later. The Norwegian king appeared to be on the verge of fulfilling his claim to the English crown. Yet victory at Fulford would prove to be short-lived. When news of the invasion reached Harold in London, he reacted with astonishing speed. Gathering his household troops and every available soldier he could muster along the way, he marched nearly 190 miles in just four days – one of the most remarkable forced marches in medieval military history. Rather than waiting for Hardrada to consolidate his position in the north, Harold intended to strike immediately. Only five days after the Battle of Fulford, the two kings would meet at Stamford Bridge, in one of the bloodiest and most decisive battles ever fought on English soil.

Claimants to the English Crown

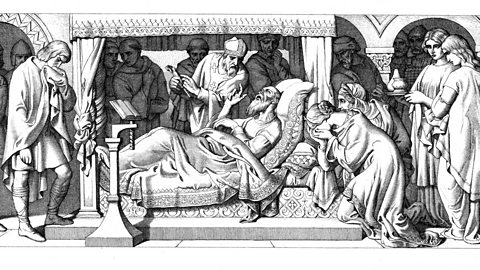
When Edward the Confessor died on January 5th 1066, he left behind one enormous problem: he had no children to inherit the throne. Unlike today, there was no fixed law stating that the eldest child automatically became monarch. Instead, the succession often depended on blood ties, promises made by previous kings, military strength and, crucially, the support of England’s leading nobles. Within days of Edward’s death, four men emerged as serious claimants to the English crown.

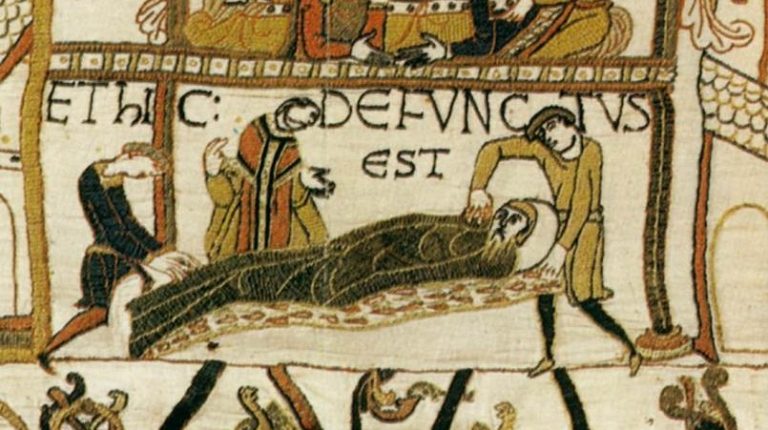
A tapestry of Edward the Confessor’s death

The strongest hereditary claim belonged to Edgar Ætheling. Edgar was Edward’s great-nephew and the last surviving male descendant of the ancient royal House of Wessex that had ruled England before the Danish invasions. By blood alone, many believed he should inherit the throne. However, Edgar was only around fourteen or fifteen years old and had little political or military experience. With England facing the threat of foreign invasion, many nobles doubted that a teenage king could defend the kingdom.

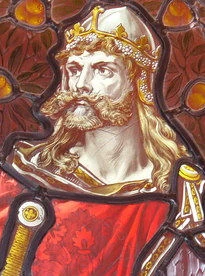
Another claimant was Harald Hardrada, the formidable King of Norway. Before becoming king, Harald had spent decades fighting across Europe and the Byzantine Empire as a mercenary commander, earning a reputation as one of the greatest warriors of his age. His claim dated back to an agreement made a generation earlier. King Magnus of Norway and King Harthacnut of Denmark and England had agreed that if either died without an heir, the survivor would inherit both kingdoms. Harthacnut died childless in 1042, but instead of a Norwegian king taking the English throne, the English nobles invited Edward the Confessor to become king. Harald, who later succeeded Magnus as King of Norway, believed that this agreement meant the English crown now rightfully belonged to him.

A glass window portrait of Hardrada

The most powerful English noble was Harold Godwinson, Earl of Wessex. Harold came from the immensely influential Godwin family. His father, Earl Godwin, had once been implicated in the death of Edward’s younger brother, Alfred Ætheling, who had been captured, blinded and later died after attempting to return to England during the reign of the Danish king Harold Harefoot. Although this created lasting tension between Edward and the Godwins, the two sides eventually reconciled. Edward married Harold’s sister, Edith, making Harold the king’s brother-in-law. Over the following years Harold became England’s leading military commander, Edward’s closest adviser and, in practice, the most powerful man in the kingdom after the king himself.

A portrait of Godwinson

The final claimant was William, Duke of Normandy. Edward’s mother, Emma of Normandy, was a Norman princess, and Edward himself had spent nearly three decades living in Normandy while England was ruled by the Danish kings Sweyn Forkbeard, Cnut and their sons. During this exile, Edward formed close ties with the Norman nobility, including William. William later claimed that Edward had promised him the English throne. To strengthen this claim further, William also argued that Harold Godwinson had sworn a sacred oath over holy relics while visiting Normandy, promising to support William’s succession. Harold would later insist that this oath had been made under duress and was therefore invalid.

A painting of William, Duke of Normandy

Edward died with Harold Godwinson at his bedside. According to Harold, the dying king entrusted him with the defence of England and named him as his successor. Whether Edward actually intended this remains one of the great historical debates, but the Witenagemot – the council of England’s leading nobles and churchmen – accepted Harold’s claim. He was crowned King Harold II in Westminster Abbey on January 6th 1066, just one day after Edward’s death. Yet while Harold now wore the crown, three other men believed it belonged to them. Before the year was over, their competing claims would plunge England into one of the most famous succession crises in European history, culminating in three great battles that changed the country forever.

The Revenge of Olga of Kiev

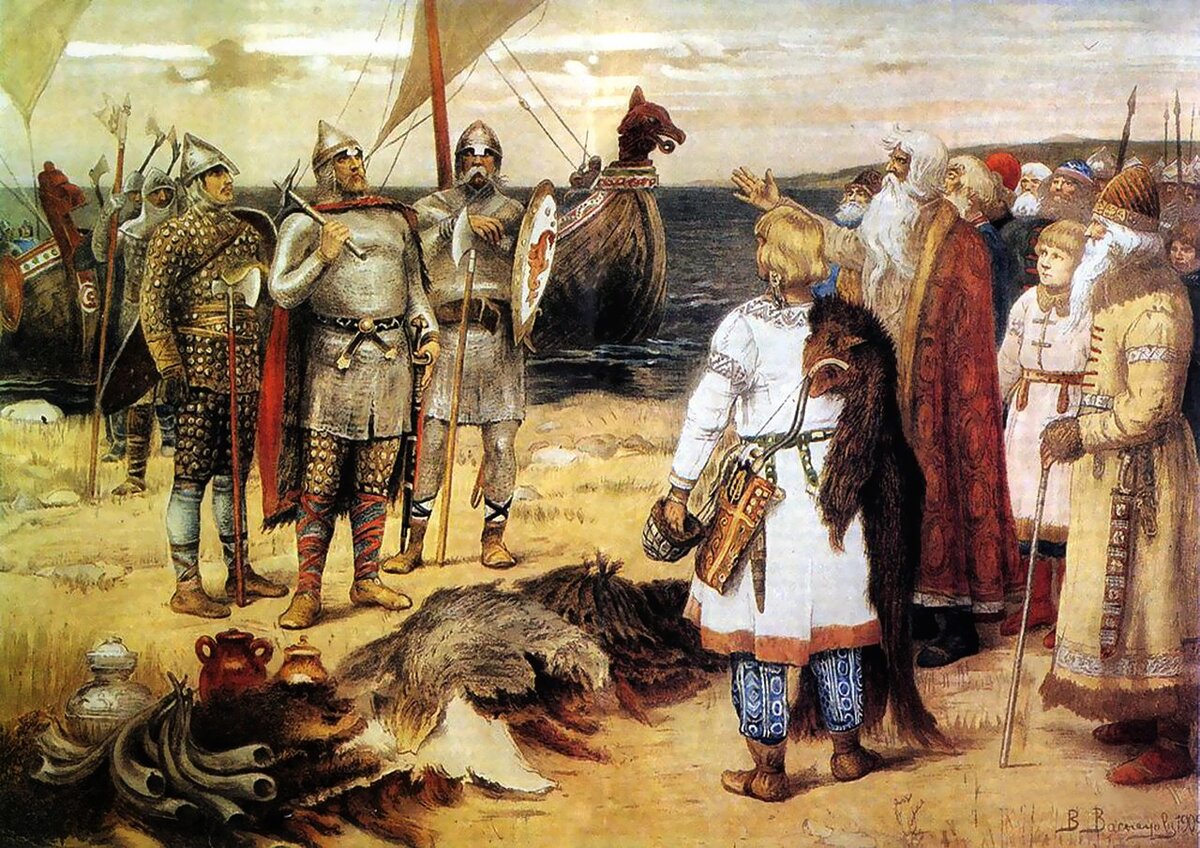
In the 10th Century, the Eastern European land of Rus was a collection of tribes who co-operated with one another for the primary purpose of trade. However, the tribes would often feud with one another, such as in the 9th Century when Slavic and Finnic tribes in Rus waged war on one another. In pursuit of peace, both the Slavs and Fins sought peace by both being governed by the Viking Ruler, Riurik. Riurik’s clan, the Varagians, had been “drove […] back beyond the sea” by the very same Slavic and Finnic tribes in an effort to establish self determination. Across the next few decades, the Varagians extended their rule over the lands of Rus all the way down to the now Ukrainian city of Kiev.

A painting Riurik and his two brothers coming to reestablish the peace

Oleg, the warrior who had conquered Kiev following Riurik’s death in 879, had a daughter who he named Olga. She married Igor, the son of Riurik and the pair soon became one of the most powerful and most loving marriages in Eastern Europe. They had one son, Syvatoslov. Upon the death of Oleg, Igor came to become Prince of Kiev and was considered a greedy, aggressive and unsuccessful ruler. In his two military expeditions to the Byzantine Empire, his fleets were destroyed by Greek Fire, although the peace settlement eventually led to a trade agreement. He extended Kiev’s authority over the neighbouring East Slavic tribes and the Pechenegs

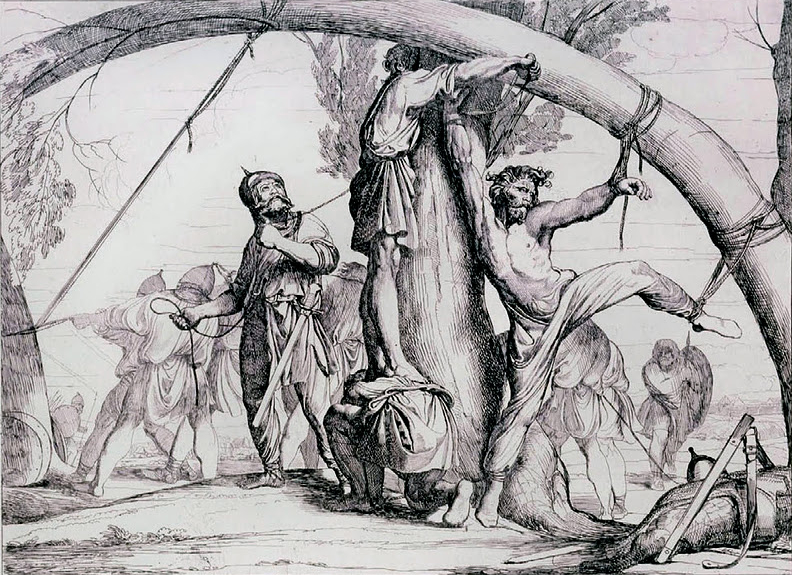
Upon Igor’s ascension to the throne, a rival tribe, known as the Drevlians, stopped paying tribute to Kiev in 912. By 945, Igor went with his army to the Drevlian capital of Iskorosten. Intimidated by the sight, the Drevlians seceded and began paying the tribute once more. However, Igor returned for more tribute payments than he was due. In response, the Drevlians decided to brutally murder him.

They had bent down two birch trees to the prince’s feet and tied them to his legs; then they let the trees straighten again, thus tearing the prince’s body apart.

Leo the Deacon, a Byzantine historian and chronicler
An illustration of the murder of Igor of Kiev

Following the death of Igor, the crown of Kiev fell to his infant son, Syvatoslov. However, due to the young age of the boy, his mother, Olga, claimed the regency until the boy was of age. Whilst many regents are often passive and are largely there to secure the position of the crown until the successor comes of age, Olga had much different ideas. Upon hearing of her husband’s brutal murder, she swore vengeance on the Drevlians and vowed to bring their tribe to a brutal end.

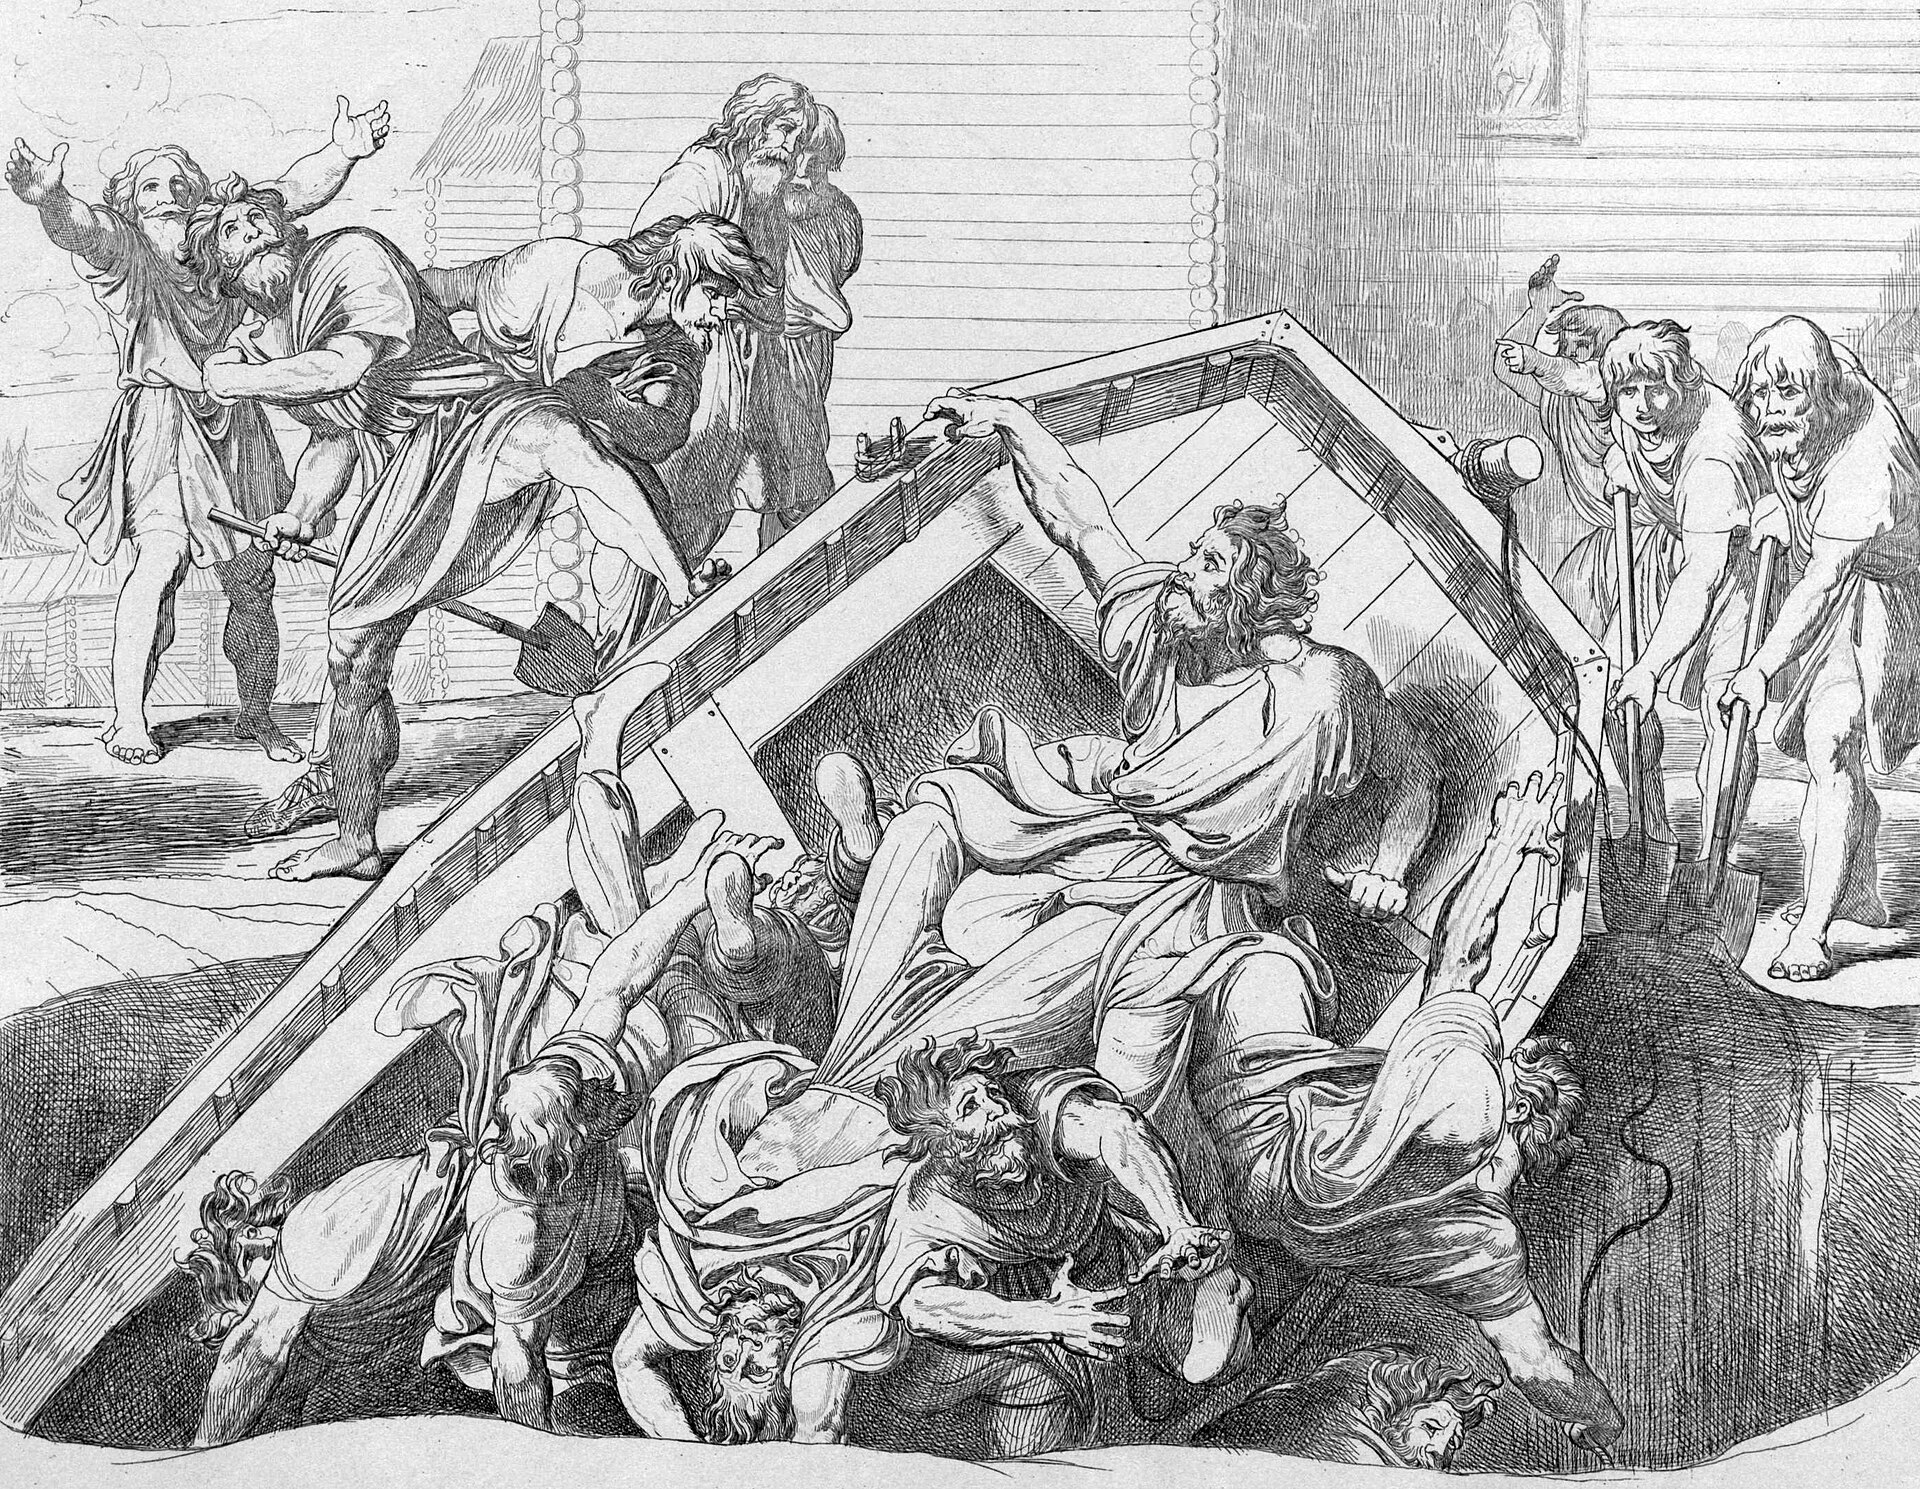
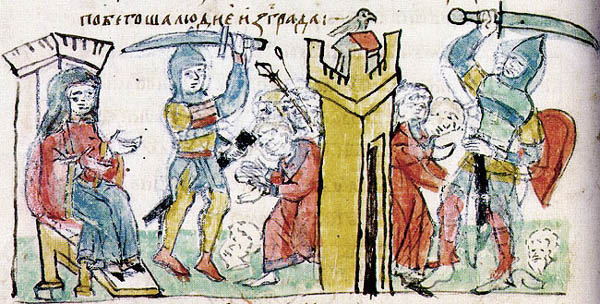
Her vengeance began when the Drevlians proposed that the recently widowed Olga marry the Drevlian Prince Mal. In response, Olga told the Drevlian emissaries to come back the next day while she considered the offer. Taking this as a good sign, the Drevlians left by boat and returned the next morning, where a group of Kievans picked up the boat and carried it across town. The ambassadors initially saw this as a sign of gratitude and welcoming, before the boat, with them inside, was thrown into a ditch that Olga had ordered to be dug the night before. The emissaries were subsequently buried alive. As they were buried, Olga allegedly kneeled next to the ditch and “inquired whether they found the honour to their taste.”

An illustration of the burial of the Drevlian Emissaries

Immediately after the first diplomatic party was buried alive, Olga sent a message to the Drevlians, requesting a second group of ambassadors. Unaware of the fate of the first group, a second group of men arrived, where they were offered a cleaning at a nearby bathhouse. Once the Drevlians were inside, Olga set fire to the bathhouse, beginning at the door, leaving the men trapped inside to burn to death. Olga offered another “olive branch” to the Drevlians, asking to gather as much mead as they could in Iskorosten, the city where her husband was killed, claiming to intending to “weep over his grave and hold a funeral feast for him.”

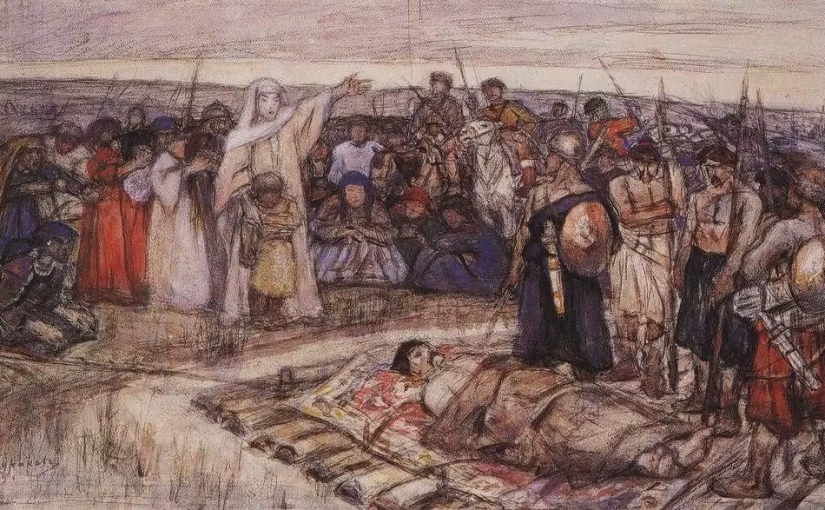
As Olga and her delegation arrived, they did as they promised: they wept over his grave and held a feast for him just outside of the city of Iskorosten. However, as the Drevlians drank and partied, the Kievan delegation abstained. Once the Drevlians were sufficiently drunk, Olga ordered her men to massacre the entire gathering, herself allegedly murdering some of the men personally. Whilst 5,000 Drevlians were murdered at the feast, Olga’s revenge was not yet complete.

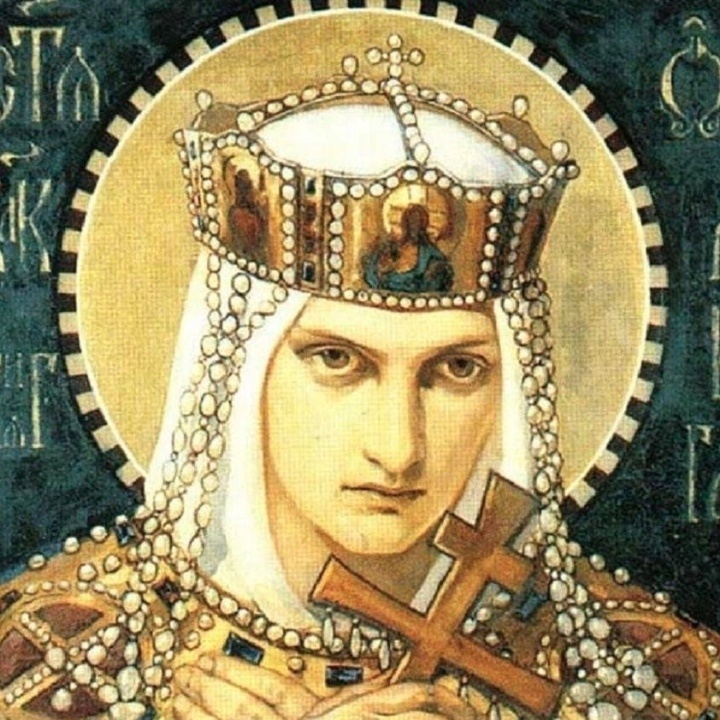
A painting of Olga

After the massacre, she led her army to the city and began to lay siege. For years, however, it remained unsuccessful. That was, until, Olga devised a plan. She first sent a message to the Drevlians.

Why do you persist in holding out? All your cities have surrendered to me and submitted to tribute, so that the inhabitants now cultivate their fields and their lands in peace. But you had rather die of hunger, without submitting to tribute.

Olga’s message to the Drevlian forces at Iskorosten

The Drevlians responded, claiming that they feared she still sought vengeance against them for the murder of Igor, something that Olga vehemently denied, claiming that the events of the feast and the diplomatic party murders had been enough for her. She instead asked for “three pigeons … and three sparrows from each house.” The Drevlians, rejoicing at the thought of the siege ending, gave her what she asked for. Upon receiving the birds, she ordered her army to tie a piece of sulphur bound by cloth to them. Then, once night fell, she ordered her men to set the sulphur aflame and release the birds. Once they returned to their nests in the houses of Iskorosten, they lit the highly flammable houses ablaze. Those who tried to escape were either massacred or taken as slaves. The survivors of the fire were forced to pay tribute.

An illustration of the burning of Iskorosten

Following her vengeance against the Drevlians, she was proposed marriage multiple more times, including by Constantine VII of the Byzantine Empire. She rejected every single one. Once her son rose to power, he allowed his mother to continue domestic affairs while he combatted foreign wars, during which time she created one of the first modern tax systems in Eastern Europe. She converted to Orthodox Christianity 957, taking the name Helena, before dying in 969. In 1547, she was canonised by the Russian Orthodox Church for being the first ruler of Kiev to convert to Christianity which laid foundational groundwork for the religion in the region.